Deploy Computer Vision Models Faster and Easier
It’s well known that training neural networks is a difficult and time-consuming process that requires a lot of attention. On top of that, learning and mastering tools for model deployment like Docker and different clouds infrastructure can also be a significant undertaking, and it’s not directly relevant to the core task of training and debugging machine learning models. We'd like to fix that.

A Stable Diffusion dreaming about fly.io deployment with MLEM 🐶
By developing MLEM - a tool that allows researchers to easily deploy their models to production without having to worry about the underlying infrastructure, we strive to help them focus on what they do best: developing and improving their models. This can help accelerate the pace of research and development, and ultimately lead to better and more effective AI systems.
MLEM deploy your models in a couple of commands - and in this blog post, we’ll deploy an image classification model to Fly.io. Without any additional user input, MLEM will serve your model with REST API, create a Streamlit application, and build a Docker image with both included. Does this sound like fun? Try out the deployment at https://mlem-cv.fly.dev before we start!
The good part
To showcase MLEM power we’ll take a pytorch model and deploy it to the cloud in
a couple of simple steps. Just don’t forget to install MLEM and other
requirements with pip install torch torchvision mlem[streamlit,flyio]. You’ll
also need docker up and running on your machine.
First, we need to get the model. To get to model deployment faster, we won’t
dive too far into model development and stick to the task at hand by using a
pre-trained ResNet model from torchvision:
from torchvision.models import ResNet50_Weights, resnet50

weights = ResNet50_Weights.DEFAULT
model = resnet50(weights=weights)
model.eval()
Since our model expects tensors of a certain shape, we need some preprocessing to be able to use it with an arbitrary image. And while we’re here, let’s throw some postprocessing on top to get class name from predicted class probabilities. Thankfully, MLEM allows you to do just that:
from torchvision.io import read_image
from mlem.api import save

img = read_image("cat.jpg")

categories = weights.meta["categories"]
preprocess = weights.transforms()

save(model, "torch_resnet",
    preprocess=lambda x: preprocess(x).unsqueeze(0),
    postprocess=lambda x: categories[
        x.squeeze(0).softmax(0).argmax().item()
    ],
    sample_data=img,
)
MLEM will do its metadata-extracting magic on our model, so we get
ready-to-serve MLEM Model at torch_resnet path.
Now we’re ready for deployment, but before we’d like to play around with it
locally. We can use mlem serve
to see how it works:
$ mlem serve streamlit \
    --model torch_resnet \
    --request_serializer torch_image  # accept images instead of raw tensors
Starting streamlit server...
🖇️  Adding route for /predict
Checkout openapi docs at <http://0.0.0.0:8080/docs>
INFO:     Started server process [17525]
INFO:     Waiting for application startup.
INFO:     Application startup complete.
INFO:     Uvicorn running on http://0.0.0.0:8080 (Press CTRL+C to quit)

  You can now view your Streamlit app in your browser.

  URL: http://0.0.0.0:80
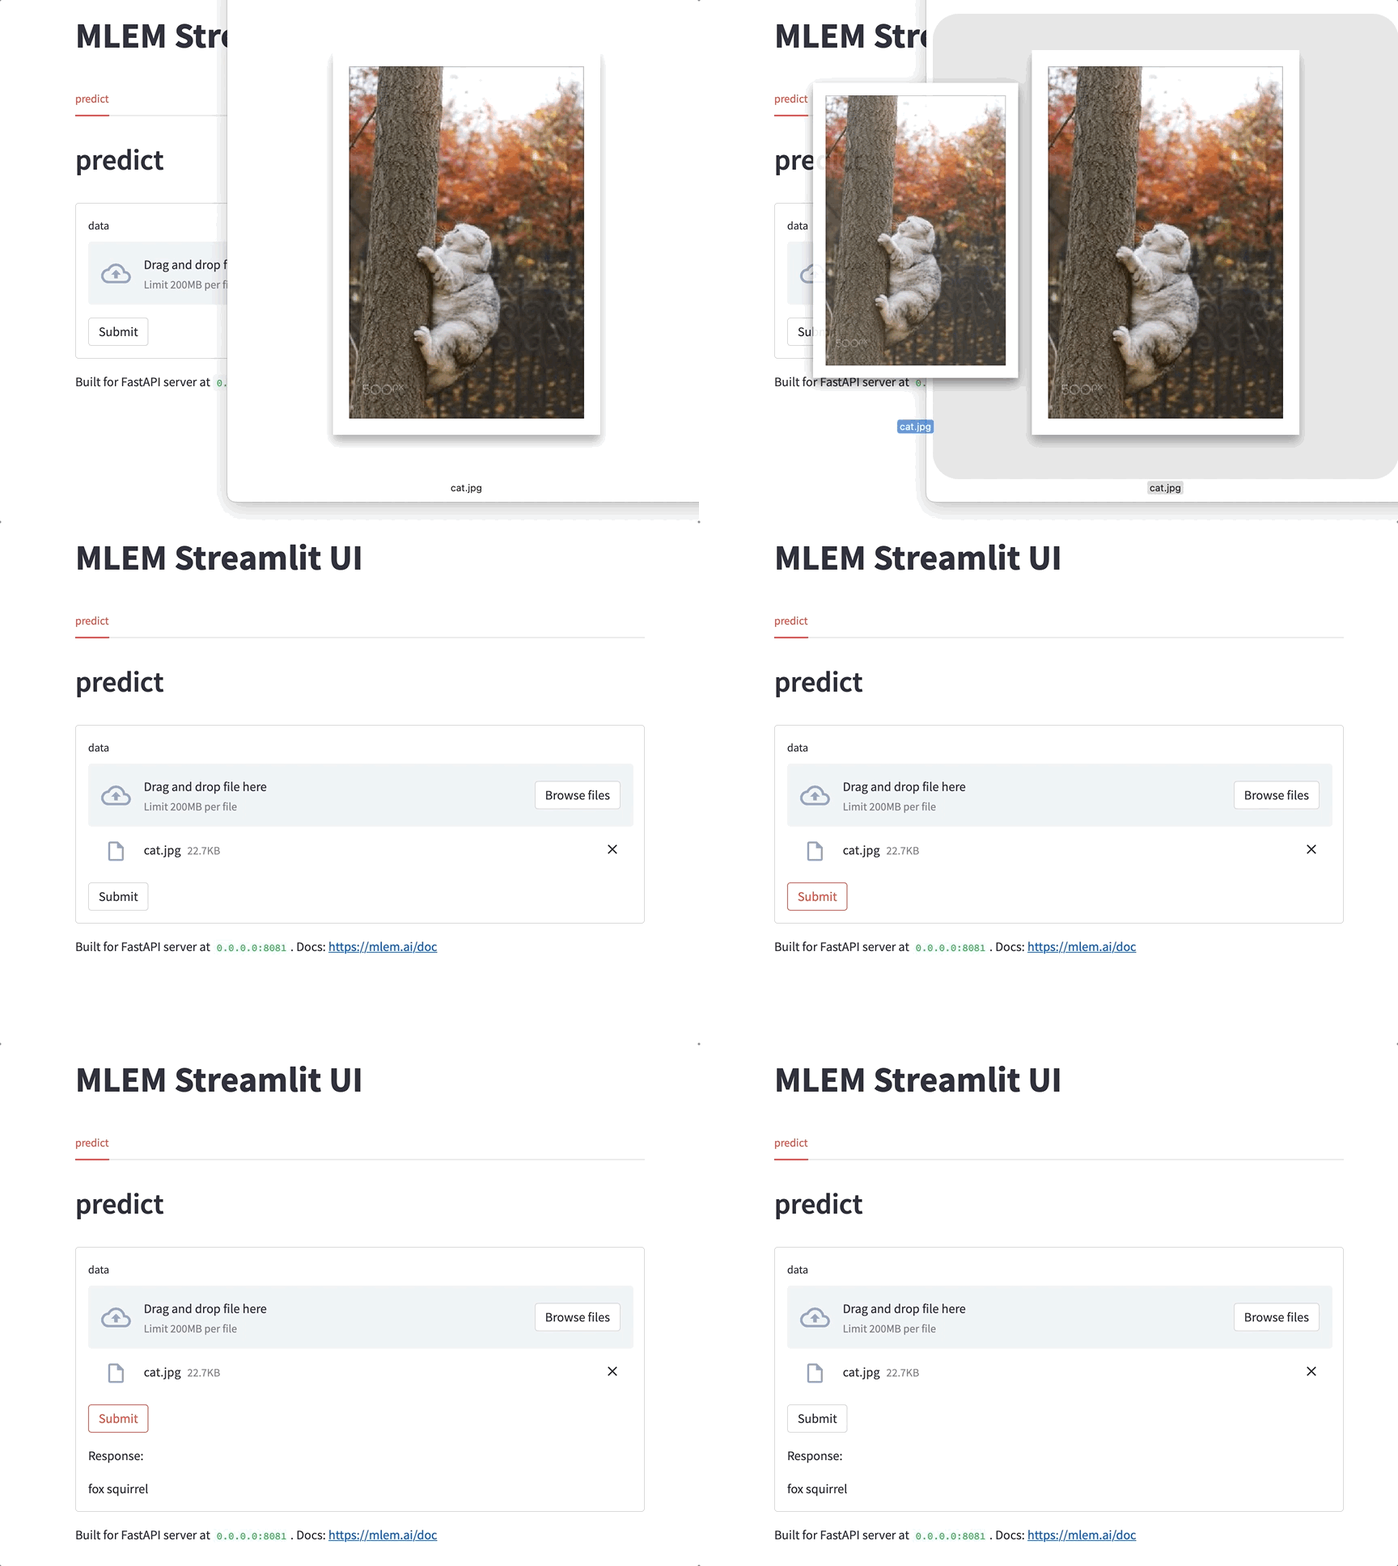
Let's head over to localhost:80 to see if our model is ready for production!

This is already useful: you can play around with your model, demo it to colleagues in a call, or show your pet how it's going to be classified now. Tons of ways to use this - give it a try when in need the next time!
Cloudification
That's cool and all, but what is your model worth if you need to call your
friends each time to show it off? MLEM can help in this department too.
Using mlem deploy you can
deploy your model to Heroku, Sagemaker, Kubernetes or Flyio (not to mention
mlem build that can build a
Docker image out of your model that you can later deploy yourself).
Since a PR for fly.io was just merged, let’s use it:
- Go to fly.io and set up an account
- Install flyctl using this instruction
- Login via
flyctl auth login - You also need to provide a credit card, but they won't charge you until you exceed free limits.
Now normally we’d need to write Dockerfile, requirements.txt and other
deployment-platform-specific files like Procfile, and then finally use
flyctl executable to run an app. But fortunately, we can just run:
$ mlem deploy run flyio cv-app \
    --model torch_resnet \
    --app_name mlem-cv \
    --scale_memory 1024 \
    --server streamlit \
    --server.request_serializer torch_image \
    --server.ui_port 8080 \
    --server.server_port 8081
Now it’s live at mlem-cv.fly.dev 🚀
Finally, all you have to do now is to brag to your best friend about your achievement:
What's next?
As we promised in our last MLEM blog post, we added support for CV models and models that have preprocessing or postprocessing steps. What's next?
- We're looking at integrations with specialized CV serving tools like TorchServe, GPU support, and model optimization.
- We already support NLP scenarios, but we're going to see if there is something special that needs to be implemented there as well.
Feel free to drop us a line in GH issues if you'd like something specific! See you next time 🐶

